
As I edit most of my images in Lightroom this program is a big part of my workflow. It didn’t only manage to save me a lot of time at the computer (that means more time for photography!) but I think it’s a rather uncomplicated program to start with as it is very visual and all adjustments are non-destructive.
Personally I keep post processing rather simple and sober. On a dark and rainy day I love to explore new options, play around or watch some tutorials, but in general I rather spent my time with my dogs and camera out in the forest wandering. The most important aspect of photography to me is capturing the precious moments, experimenting and exploring. Therefore my workflow follows that rhythm. There is of course so much possible and everyone has his/hers own style and preferences. And that’s the cool part of post-processing of course.
To avoid unnecessary time in post, I try and get as much as possible right at the moment of shooting. This means paying attention to details, exposure, white balance and composition. I won’t easily think: “Oh, I’ll just fix that in post…” but rather look for solution at the scene. I also wrote about my love for non-zoom lenses before which means I really have to think about composition. (I almost never crop afterwards)
How I edit in Lightroom:
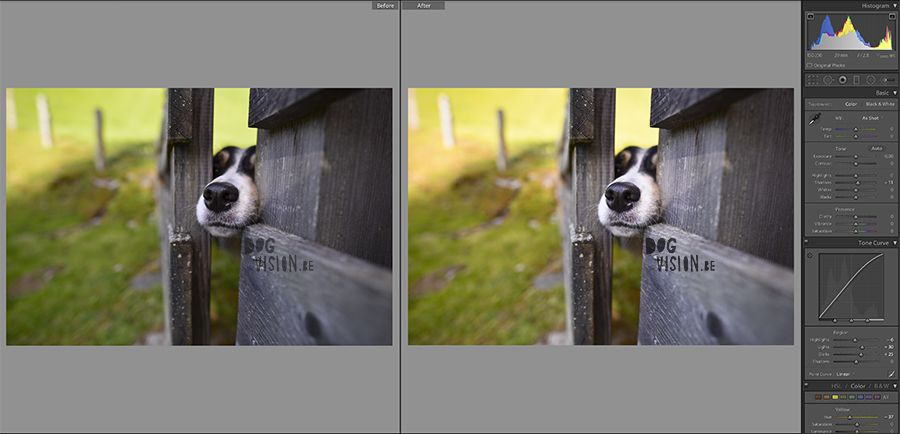
1.First of all I check the overall brightness and contrast. If your image is overall a bit dark you can easily adjust with the exposure- slider. But be aware that this affects the whole image, both dark and light parts of your photograph. Same goes for the contrast-slider which adjusts the overall contrast of your image. It might be to harsh quickly. More subtle and a great way to make your image pop is working with curves. You can either work on the curve itself of choose o adjust the sliders. With curves you can adjust very specifically to makes changes to your highlights, shadows or midtones. I always keep an eye on the highlight that they don’t blow out and my shadows that I still have some detail in it.
2. Secondly I check the colors and I wonder if there is any dominant color. It might take some practice to recognize the different colors in your photographs but it definitely helps to make well thought adjustment. A common issue is for example a magenta cast (a pink-red color that is the opposite of green on the color wheel). You can neutralize it with the green-magenta slider and pull it to green as much as needed. You can select a before and after easily and no adjustment is final until you export.
If your image feel very cold, you can give it a warmer tint with sliding in some more yellow. With these sliders I go for a neutral looking image to work on further.
Then I prefer working on more specific areas or colors instead of the overall image. There are two colors that I personally don’t like to see too much in an image and that’s cyan and yellow. In the picture below I selected the color adjustment panel and made yellow tones a bit warmer by sliding the a bit to orange instead of bright yellow.
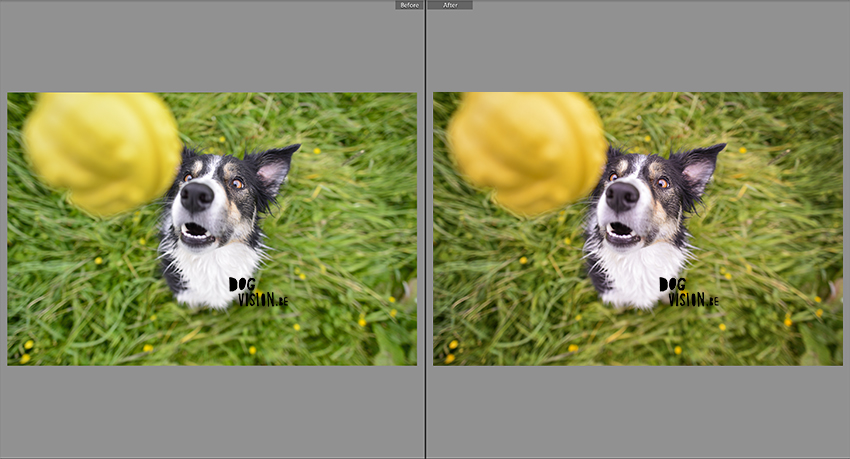
What I avoid is adjusting colors with the saturation option. Saturation will boost the intensity of all the colors in your image, whether they are intense already or not. Boosting too much will give you an unnatural look and you risk loosing detail in over saturated areas.
The vibrance options works smarter on you colors by only boosting the dull colors. This makes your image come to life without loosing detail or ending up with a fake looking scenery.
This are my most used adjustments. And what I really like about this program is that you can easily see a before and after and you can keep working the image – and even reset everything- until you export the final result.
3. A final step is selecting all the images that have the same settings. With one click I can copy all adjustments to the others in my selection and …ready! I export all finished images in a map in high resolution and perhaps export some in web-resolution with a watermark too.
If you like this blogpost, you might be interested in reading more tips & tricks for dog photography. All questions and remarks are of course still welcome. Feel free to leave a message below, find us on facebook, twitter or instagram.

2 Comments
Pingback: Dog photography 101 – DOGvision
Pingback: Riverside, the story behind the photo – DOGvision